
Creating a Sculpture, From Start to Finish
- diepimaginations
- Sep 13, 2020
- 3 min read
Updated: Sep 15, 2020
The process to transform a clay sculpture into a finished bronze work is more complex than most people know. John likes to be as involved as possible in every step of this process, frequently visiting the foundry that does his work to make sure the finished product retains as much of the integrity of his original piece as possible.
First, John creates a clay sculpture using wires and armatures. Then, he cuts the clay into sections in order to make the first negative mold.

Then, he applies rubber in layers to the clay pieces (which can either be poured on or brushed on gently.) He uses an air nozzle to push out all air bubbles in between each application. The first few layers are done so thinly you can see the clay through them. The next few layers are applied with a thickened rubber to create a heavier coat. Finally, John embeds a nylon mesh between the thicker layers of rubber in order to strengthen the mold. A plaster mold is applied on top of the rubber to lock in the form of the sculpture. Once the mold hardened, the clay is removed from this mold.
These rubber and plaster molds only need to be created once. When new statues are ordered, John uses these molds and repeats all of the following steps.
John wraps the molds with rubber bands to hold them in place and pours melted wax into holes in the molds in his workshop. To build up the wall in increments he first uses an extremely hot wax that can get into all the little details. The reason it needs to be hot is so it can reach all the details before it begins to cool. He then dumps out the excess wax. Then he repeats this process twice more with slightly cooler wax to build up the thickness of the wax. The wax replica is removed from the mold after it cools. Any imperfections left by the wax pouring process are then resolved (seams are removed, air bubbles need to be filled in, etc) Any extra cuts that need to be made for the casting process also occur at this stage.
Then John takes the wax replica to a foundry where it is sprued and gated which creates a series of channels for the bronze to be able to fill the sculpture when it gets to the pouring process.
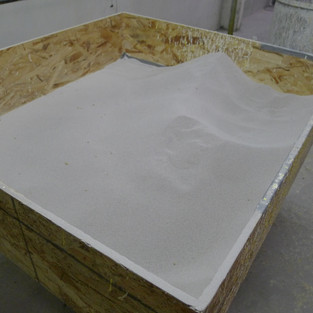
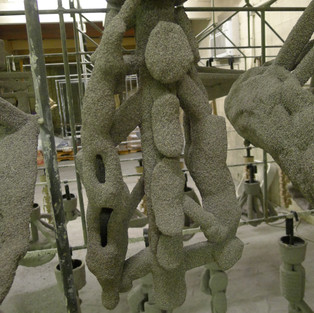
The ceramic mold making process now begins. The wax is dipped into a heat resistant liquid and coated in stucco sand. Sculptures are coated between 6-12 times, drying completely between each coating. This process can last several weeks.

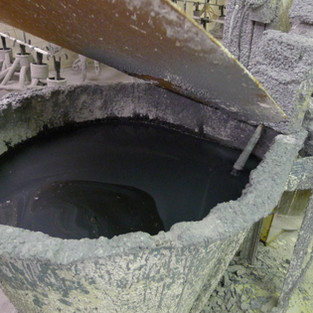

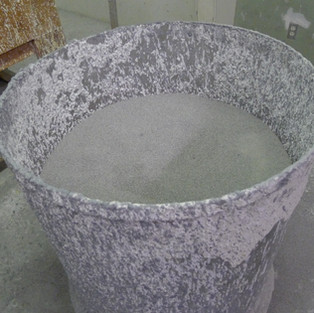


Once the ceramic mold is finished it's heated in a kiln to melt the wax out of the mold. The empty mold is then placed in position to be filled with molten bronze. The bronze is poured into the holes created by the sprues, filling the mold.


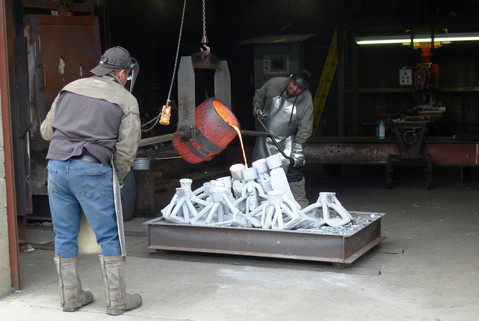

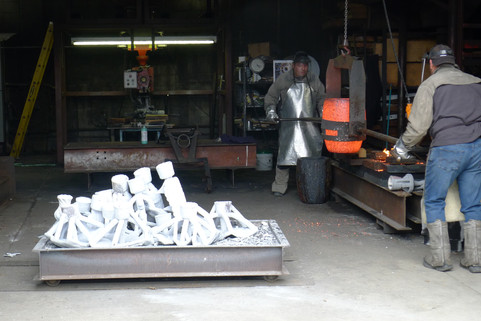


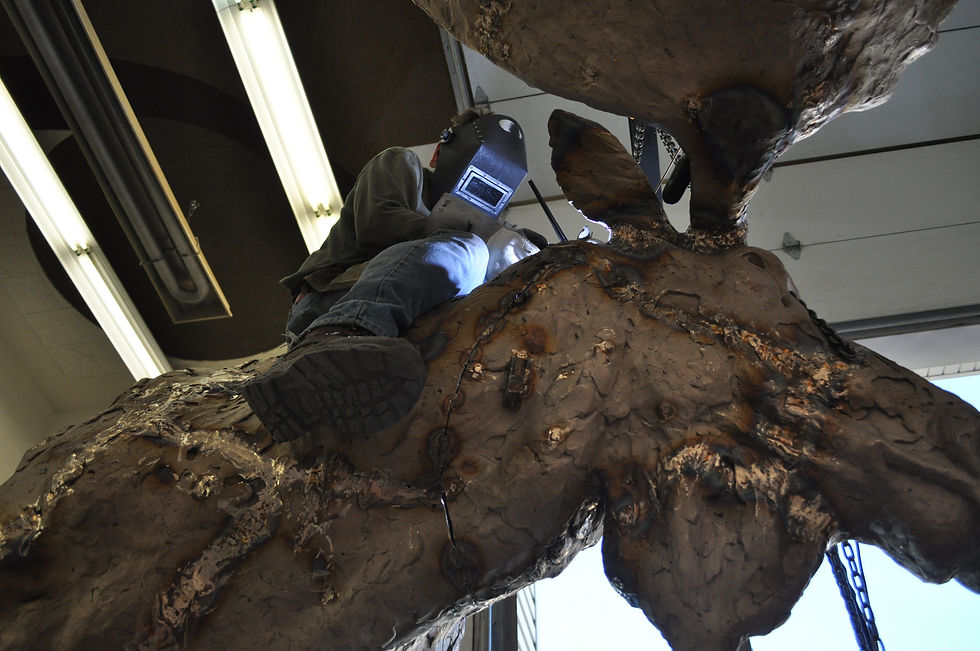
Once fully cooled, the ceramic mold is broken off and the sprues are removed. The sculpture goes through a sand blasting process and the parts that were separated at the clay stage and or waxing stage are welded back together. John welds the parts himself and makes any adjustments as needed to preserve the integrity of the original sculpture.

Back at the foundry, a patina is applied to the bronze to essentially color/paint it.

John takes his sculpture home and makes any last adjustments then finally mounts the completed sculpture onto a base.

Comments